Wheel Bearing Replacement
SAFETY FIRST: Protective gloves and eyewear are recommended at this point.
Replace bearings as a set, and do not reuse old bearings.
Front Wheel
Removal
Warning: Do not set wheels on their brake discs when removing bearings.
Remove the front wheel. See the Front Wheel topic for more information.
To remove the brake discs see the Brake Disc topic.
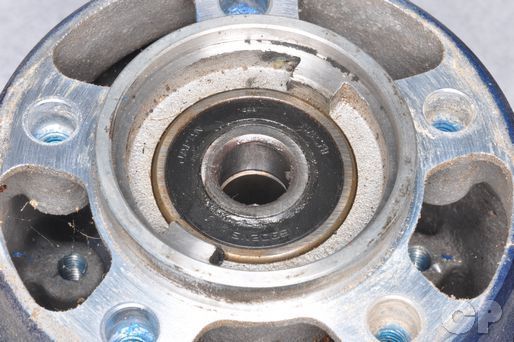


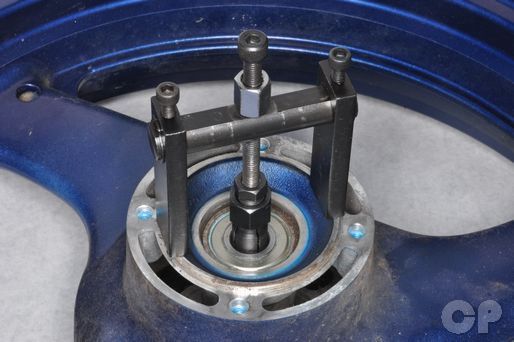
Remove one of the wheel bearings using a bearing puller. If a bearing puller is not available, you can use a long flat faced punch and a steel hammer. With either technique, heating the wheel around the bearing with a heat gun will make this job much easier.
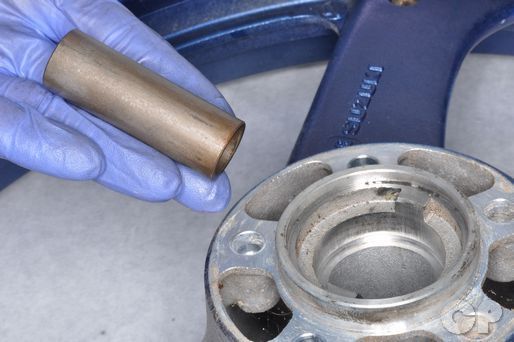
Pull out the distance collar. Pull out the second bearing or drive it out from the other side.
Installation
Note; The new bearings should be installed with the sealed side facing out.
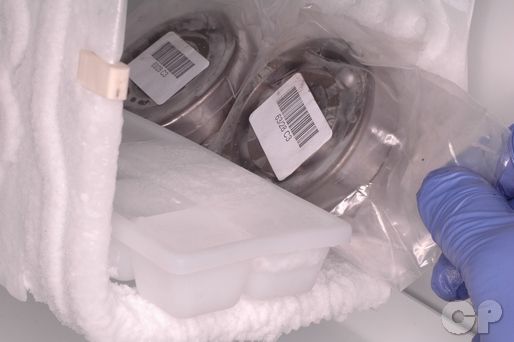
Place the new bearings in the freezer for about an hour before installing them.
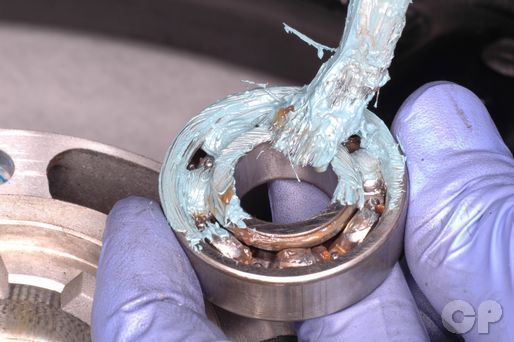
Apply Suzuki A grease to the bearings.


Install the left bearing first. Heat the bearing area of the wheel with a heat gun. Drive in the bearing by its outside diameter with a suitable bearing driver or using the Suzuki special tool.
Special tools-
Bearing Installer Set: 09924-84510 (600)
Bearing Installer Set: 09924-84511 (750)
Install the distance collar.
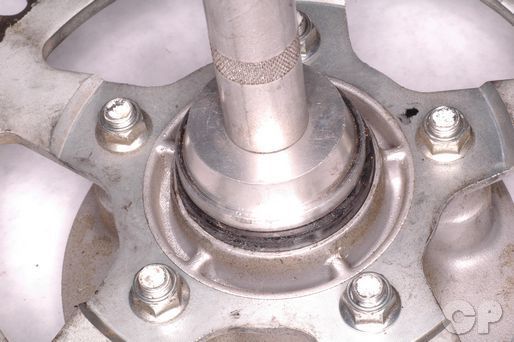
Drive in the right bearing with a suitable bearing driver. Note, avoid moving the left bearing when seating the right bearing on the 750 models.
Install the front wheel. See the Front Wheel topic for more information.
Rear Wheel
Removal
Remove the rear wheel. See the Rear Wheel topic for more information.
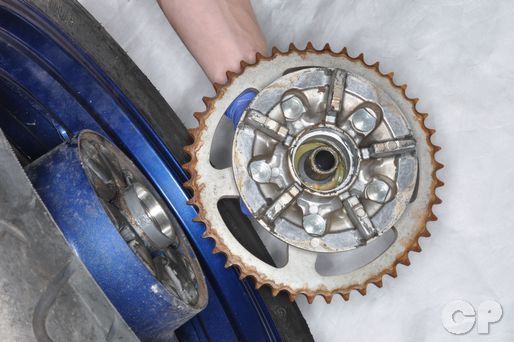
Remove the rear sprocket mounting drum from the cush drive.


Remove the spacer from the outside of the sprocket drum and the retainer from the inside of the sprocket drum.


Remove the dust seal from the sprocket drum with a seal pick.


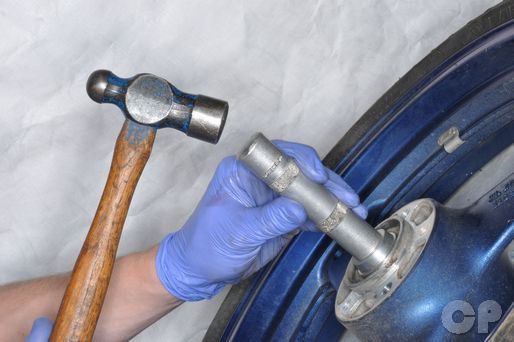
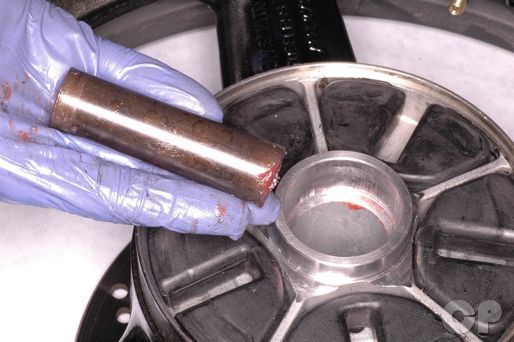
Drive out the sprocket drum bearing from the inside with a bearing driver or a socket with the same inside diameter of the bearing.


Remove one of the wheel bearings using a bearing puller. If a bearing puller is not available, you can use a long flat faced punch and a steel hammer. With either technique, heating the wheel around the bearing with a heat gun will make this job much easier.
Pull out the distance collar.
Remove the remaining bearing.
Installation
Note; The new bearings should be installed with the sealed side facing out.
Place the new bearings in the freezer for about an hour before installing them.
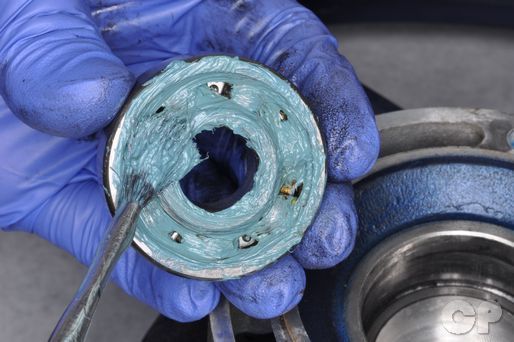
Lubricate the bearings with grease.
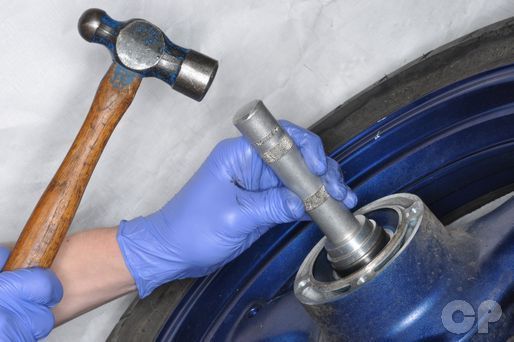
Heat the bearing area of the wheel with a heat gun, take one of the bearings out of the freezer and install it the right side. You can use a bearing installer tool, bearing driver, or a socket with the same outside diameter as the OD of the bearing. Make sure the bearing is fully seated and the marked side is facing out.
Install the distance collar.


Heat the wheel with a heat gun, remove the other wheel bearing from the freezer and install it. If you freeze the bearings and heat the wheel, the bearings should drop into place with very little pressure required.
Note, avoid moving the left bearing when seating the right bearing on the 750 models.
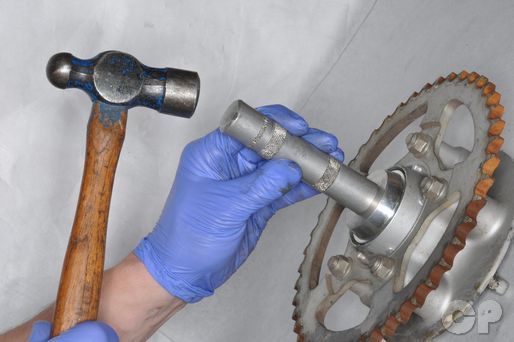
Drive in the new sprocket drum bearing with a suitable bearing driver or a socket with the same outside diameter as the OD of the bearing.
Grease the back side and lip of the new dust seal. Tap it into position in the
left side of the hub with a suitable driver or a hammer and a socket with the same outside diameter of the dust seal.
Install the rear wheel. See the Rear Wheel topic for more information.
Adjust the drive chain. See the Drive Chain Adjustment topic for more information.
Copyright - Cyclepedia Press LLC

Note: If you are viewing this document offline be sure to visit the latest version online at http://www.cyclepedia.com before attempting any repairs. Updates are made without notice.